

Step-by-Step Tutorial: IIS
Redirect/Rewrites for SharePoint
NOTE: THIS IS NOT SUPPORTED BY MICROSOFT; PROCEED WITH CAUTION AND AT YOUR OWN RISK.
Perform the following steps on the Web Front End servers only.
When working with websites, it is imperative for the users, customers, and possibly potential customers to be able to locate information when accessing them. Change is inevitable within life just as much as it is in the companies and organizations that employ us. Companies change their structure, names, products, and so forth, which eventually reach the website. This tutorial will ensure that any of those do not impact SEO rankings and 404 Page Not Found errors.
Initial Install/Setup
Download and install the Rewrite Plugin for IIS Redirect
In order to obtain the extension for IIS go to http://www.iis.net/downloads/microsoft/url-rewrite and download the extension.
Once the extension is downloaded, you can install it on the server. After the extension is installed, close and reopen IIS Manager to begin utilizing the extension.
Create a Mapping
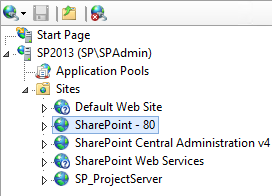
1. From within IIS Manager, click on the site you wish to add the redirect/rewrites too.
2. Under the IIS section in the middle pane select URL Rewrite.

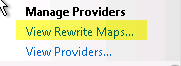
3. On the right in the Actions panel, select the View Rewrite Maps under the Manage Providers.
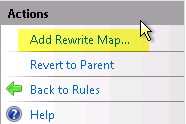
4. From the Actions pane on the right, select the Add Rewrite Map
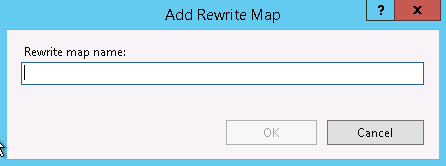
5. Enter a name for the new mapping.
6. After creating the map, double-click on the mapping.

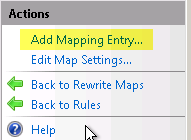
7. From the Actions pane on the right, click Add Mapping Entry
8. In the pop-up window, enter the old URL in the Original Value. Then enter the new URL in the New Value section and click OK.
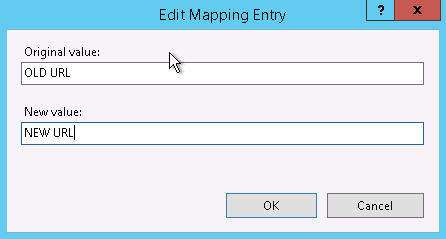
9. You will then see the new entry in the pane.

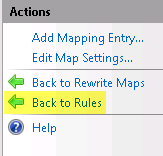
10. Once you have added your entry then, from the Actions pane on the right, select Back to Rules.
Create a Rule Referencing the Mapping for IIS redirect
Now that you have created the mapping, you must create the rule to reference the mapping.
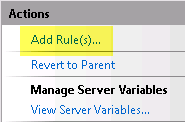
1. From the Actions pane on the right click the Add Rule.
2. When selecting the type of rule from the pop-up pane, select the Rule with Rewrite Maps.

3. In the pop-up pane for Select the Rule Action, you can select either Redirect or
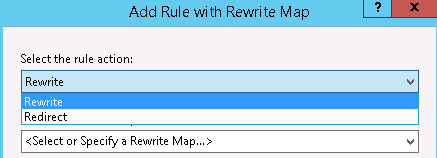
4. From the same pop-up pane select your mapping you created previously.

5. After you click OK you will see your new rule referencing your mapping.
How to Add Bulk Entries
Sometimes it is necessary to enter multiple entries and the process can be tedious to do one at a time through IIS. Once the original mapping and rule is created, you can then enter additional entries straight into the web.config for the website.
NOTE: PROCEED WITH CAUTION. CREATE BACKUPS OF YOUR WEB.CONFIG BEFORE EDITING.
Locate The Web.Config File
Navigate to the following path:
C:\inetpub\wwwroot\wss\VirtualDirectories\(select the site here)
Edit The Web.Config
1. Once you have the web.config file open locate the following tag
<rewrite>
  <rewriteMaps>
    <rewriteMaps name="Old SharePoint">
2. Once you have located this section you can add entries to the web.config by following the format below
<add key="OLD URL" value="NEW URL" />
3. After adding all of your entries you can then save the web.config file.
These entries will take effect immediately without having to do an IIS reset or server restart.
It is as simple as that. Again, by creating the redirects or rewrites you are saving your SEO, maintaining the user experience and preventing a lot of pesky help desk calls. So, if you need to rename a web application, a library or revamp the whole structure of a site, this method will keep your links working and information accessible.
Thank you for reading this post! If you enjoyed it, I encourage you to check out some of our other content on this blog. We have a range of articles on various topics that I think you’ll find interesting. Don’t forget to subscribe to our newsletter to stay updated with all of the latest information on Imaginet’s recent successful projects
discover more
Getting Started with Viva Topics
Microsoft Viva Topics is a knowledge management solution that helps you organize, discover, and share information across your organization. Get started with Viva Topics today and unlock the power of…

Microsoft Viva Connections is Now Generally Available
Viva Connections desktop is available to all customers as part of their existing Microsoft 365 and SharePoint licenses. Learn how to….

Guide to Blazor JavaScript Interop
Guide to Blazor JavaScript Interop Blazor is an exciting new framework from Microsoft that allows us to create full featured websites using C# instead of JavaScript. Like many web frameworks…
Let’s build something amazing together
From concept to handoff, we’d love to learn more about what you are working on.
Send us a message below or call us at 1-800-989-6022.